

The cherimoya, or custard apple, stands as a testament to nature’s confectionary prowess. With a flavor profile often described as a blend of pineapple, banana, and strawberry, this creamy fruit is a coveted prize for gardeners in subtropical climates. While commercial growers often rely on grafting to ensure fruit consistency, the process of growing a cherimoya tree from a simple seed is an accessible and deeply rewarding journey for the home cultivator. This method, though requiring patience, offers a unique window into the life cycle of this remarkable plant, from a dormant seed to a potentially fruit-bearing tree.
Introduction to cherimoya seed germination
Understanding the cherimoya plant
The cherimoya (Annona cherimola) is a deciduous or semi-evergreen shrub or small tree native to the Andean valleys of Ecuador, Colombia, and Peru. It belongs to the Annonaceae family, which includes other tropical favorites like the soursop and pawpaw. The tree is characterized by its large, green, ovate leaves and its unique, heart-shaped fruit covered in a scale-like skin. A critical aspect to understand is that cherimoya seeds are toxic if ingested and should be handled with care, always separated from the edible pulp before consumption.
Why grow from seed versus grafting ?
Growing from seed is an excellent entry point for novice gardeners. It is an inexpensive and readily available method, as seeds can be harvested directly from store-bought fruit. This process allows the grower to witness the entire life cycle of the plant. However, it’s important to set realistic expectations. A tree grown from seed is not a clone of its parent and the fruit quality can be variable. It will also take significantly longer to produce fruit, typically five to seven years, compared to a grafted tree which can bear fruit in as little as two years.
- Genetic diversity: each seed is a unique genetic individual, which can result in variations in fruit size, flavor, and tree vigor.
- Adaptability: seedlings often develop stronger taproots and may be better adapted to the specific soil and microclimate of your garden.
- Cost-effective: seeds are virtually free if you are already enjoying the fruit, making it a low-risk horticultural experiment.
With a clear understanding of the plant and the pros and cons of seed propagation, the first practical step is to acquire and prepare viable seeds for planting.
Selecting and preparing cherimoya seeds
How to choose the best seeds
The journey to a healthy seedling begins with a healthy seed. The quality of your starting material will have a direct impact on germination rates and the overall vigor of the young plant. Start by selecting a fully ripe cherimoya fruit. A ripe fruit will yield slightly to gentle pressure, similar to a ripe avocado, and may have developed a yellowish-green or creamy-yellow hue. Avoid underripe or overripe, mushy fruits. Once you have your fruit, carefully extract the large, black, glossy seeds from the creamy pulp.
The crucial cleaning and drying process
Once extracted, the seeds must be thoroughly cleaned. Any remaining fruit pulp can attract mold and fungi, which will inhibit or prevent germination. The cleaning process is straightforward:
- Place the seeds in a fine-mesh sieve and rinse them under cool, running water.
- Gently rub the seeds with your fingers or a soft brush to remove all traces of the sugary pulp.
- After cleaning, spread the seeds on a paper towel or a dry cloth.
- Let them air-dry in a well-ventilated area away from direct sunlight for one to two days. Do not use artificial heat to dry them, as this can damage the embryo inside.
The goal is to have seeds that are clean and dry to the touch but not so dehydrated that they lose viability.
Assessing seed viability
Not all seeds from a fruit will be viable. You can perform a simple check to improve your chances of success. Discard any seeds that are visibly damaged, cracked, or unusually small and shriveled. A healthy, viable cherimoya seed should be plump, dark, and hard. For a more definitive test, you can perform a float test. Place the dried seeds in a container of water. Viable seeds are denser and will typically sink to the bottom after a few minutes, while non-viable or empty seeds will often remain floating.
Having selected and prepared your seeds, the next stage involves creating the perfect environment to coax them out of dormancy and into active growth.
Ideal conditions for cherimoya seed germination
Temperature and climate considerations
Cherimoya seeds require warmth to germinate successfully. They are native to subtropical regions and will not sprout in cold soil. The optimal soil temperature for germination is consistently between 70°F and 85°F (21°C to 29°C). In cooler climates, using a heat mat under your seed tray can provide the necessary bottom heat to encourage sprouting. It is essential to maintain this warmth throughout the germination period, which can last from three weeks to over a month.
| Condition | Optimal Range | Notes |
|---|---|---|
| Soil Temperature | 70-85°F (21-29°C) | Use a heat mat if ambient temperature is too low. |
| Air Temperature | 65-80°F (18-27°C) | Protect from drafts and sudden temperature drops. |
| Germination Time | 3-5 weeks | Can be longer if conditions are not optimal. |
The best soil mix for germination
Cherimoya trees demand well-draining soil to prevent root rot, and this is especially true for seeds and seedlings. A heavy, waterlogged medium will quickly kill a sprouting seed. You can purchase a pre-made seed starting mix or create your own. A good homemade mix consists of:
- One part peat moss or coco coir: for moisture retention.
- One part perlite or coarse sand: to ensure excellent drainage and aeration.
- One part compost or aged pine bark: to provide gentle, slow-release nutrients.
Before use, it can be beneficial to sterilize your soil mix by baking it in an oven to kill any potential pathogens or fungus gnat eggs.
Light and humidity needs
While the seeds themselves do not need light to germinate (they will be buried in the soil), the environment should be prepared for the moment they sprout. Place your seed pots or trays in a location with bright, indirect light. A north-facing window or a spot several feet from a south-facing window is ideal. To maintain the high humidity that aids germination, you can cover the pots with a clear plastic dome or a plastic bag. This creates a mini-greenhouse effect, keeping the soil moist and the air humid. Be sure to allow for some air circulation daily to prevent mold growth.
With the ideal conditions established, you are now ready for the exciting step of actually planting the prepared cherimoya seeds.
Steps to plant cherimoya seeds
Enhancing germination with pre-treatment
While not strictly necessary, pre-treating your cherimoya seeds can speed up the germination process by helping water penetrate the hard seed coat. Two common methods are soaking and scarification. Soaking is the easiest and safest method: simply place the seeds in a bowl of warm water for 24 hours before planting. This softens the outer shell. Scarification involves lightly scratching or nicking the seed coat with a file or sandpaper, away from the small embryonic end. This technique requires a gentle touch, as damaging the embryo will prevent germination.
Proper planting depth and spacing
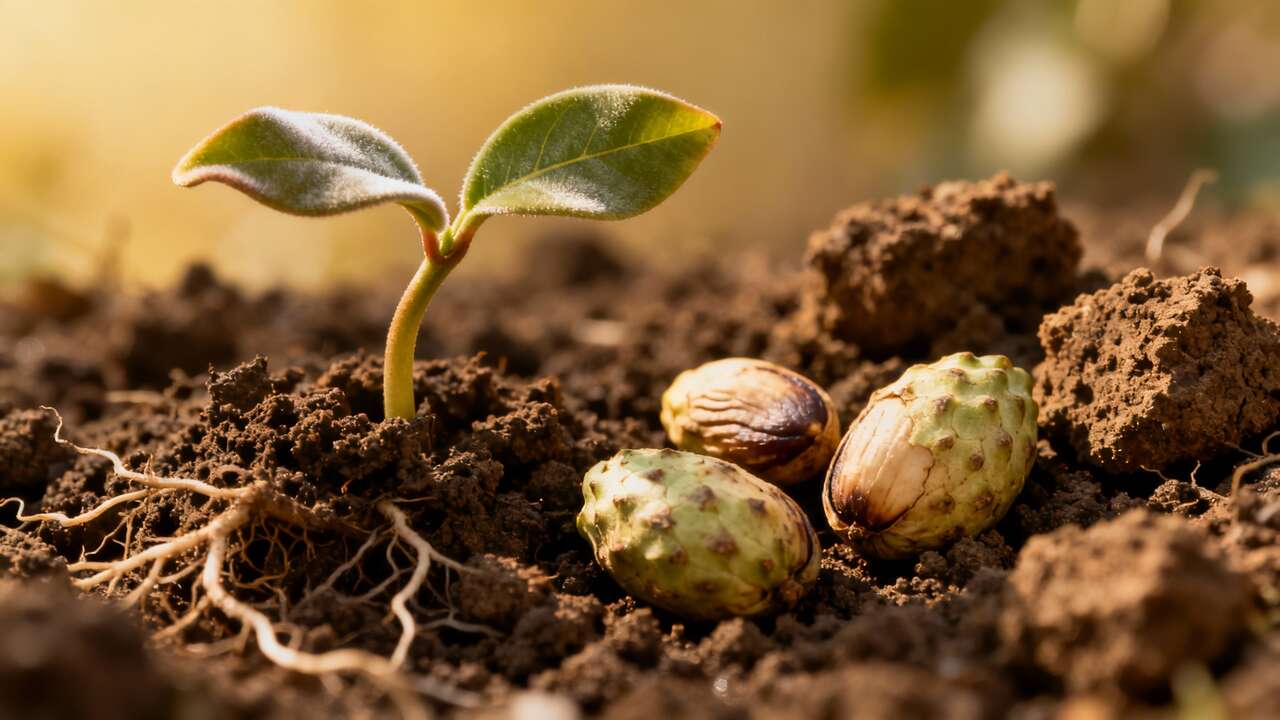
Fill your chosen containers, such as 4-inch pots or a deep seed tray, with your prepared, pre-moistened soil mix. Plant one cherimoya seed per pot to avoid competition between seedlings later on. The correct planting depth is crucial. A general rule of thumb for seeds is to plant them at a depth equal to twice their diameter. For cherimoya seeds, this means planting them about one inch deep. Place the seed on its side in the hole and cover it gently with soil, tamping down lightly to ensure good contact between the seed and the soil.
Watering and waiting for sprouts
After planting, water the soil thoroughly until water drains from the bottom of the pot. From this point on, the key is to keep the soil consistently moist but never waterlogged. Check the soil every day or two by touching the surface. If it feels dry, water gently.
- Use a spray bottle or a gentle watering can to avoid dislodging the seed.
- Cover the pot with your plastic dome or bag to retain humidity.
- Place the pot in a warm location with indirect light.
- Be patient. Germination can take several weeks. You should see the first signs of a green shoot emerging from the soil within three to five weeks.
Once the seed has successfully germinated and a small seedling appears, the focus shifts from germination to nurturing the young plant’s growth.
Caring for young custard apple seedlings
Watering and light for new seedlings
As soon as your seedling emerges, it will begin to require light for photosynthesis. Remove the humidity dome or plastic cover to improve air circulation and prevent fungal diseases like damping-off. Move the pot to a location where it will receive at least six hours of bright, indirect sunlight each day. A south-facing window with a sheer curtain can be an ideal spot. Avoid intense, direct sun, which can scorch the delicate leaves of a young seedling. Continue to keep the soil consistently moist. Allow the top inch of soil to dry out slightly between waterings to encourage strong root development.
When and how to transplant
Your cherimoya seedling can remain in its starter pot until it has developed several sets of true leaves and stands about six inches tall. At this point, it will likely need more space for its roots to expand. This is the time to transplant it into a larger, one-gallon pot.
- Choose a new pot that is at least two inches wider in diameter than the current one.
- Fill the new pot with a quality potting mix that drains well.
- Carefully remove the seedling from its original pot, trying to keep the root ball as intact as possible.
- Place the seedling in the new pot at the same depth it was previously growing.
- Fill in around the root ball with fresh soil and water thoroughly to help it settle.
After transplanting, keep the seedling in a shaded area for a few days to help it recover from the shock before moving it back to its sunny spot.
Initial fertilization
Young seedlings do not require much fertilizer. The nutrients present in a good quality potting mix are usually sufficient for the first few months of growth. Once the seedling is well-established in its new, larger pot and is actively growing, you can begin to fertilize. Use a balanced, water-soluble fertilizer, such as a 10-10-10 or 20-20-20 formula, diluted to one-quarter or one-half strength. Apply this diluted fertilizer once a month during the active growing season (spring and summer).
Properly caring for your seedling will set the stage for its long-term health, which can be further ensured by following best practices for cultivation as the tree matures.
Tips for successful cherimoya tree cultivation
Managing common pests and diseases
Young cherimoya trees can be susceptible to several common garden pests. Keep an eye out for mealybugs, which look like small white cottony masses, and scale insects, which appear as small bumps on stems and leaves. These can often be controlled by dabbing them with a cotton swab dipped in rubbing alcohol or by spraying the plant with insecticidal soap. The most significant disease threat is root rot, caused by overwatering and poorly draining soil. Always ensure your pot has drainage holes and allow the soil to dry out partially between waterings. Good air circulation is also key to preventing fungal issues on the leaves.
Long-term fertilization strategy
As your cherimoya tree grows, its nutritional needs will change. Mature trees benefit from a balanced fertilizer that also contains micronutrients like zinc and iron. A good feeding schedule is essential for promoting healthy growth and eventual fruit production.
| Time of Year | Fertilizer Type | Application Notes |
|---|---|---|
| Early Spring | Balanced (e.g., 10-10-10) | Apply as new growth begins. |
| Late Spring/Early Summer | Balanced (e.g., 10-10-10) | Second application to support foliage growth. |
| Late Summer | Low-Nitrogen (e.g., 6-10-10) | To encourage flowering and fruiting potential. |
| Fall/Winter | None | Allow the tree to go dormant. |
The virtue of patience
Perhaps the most important tip for growing cherimoya from seed is to have patience. Unlike a grafted tree, a seedling has a long juvenile period. It will take several years before it is mature enough to flower and produce fruit. Furthermore, cherimoya flowers have a unique pollination challenge: the female parts of the flower are receptive before the male parts release pollen. In many regions without their natural pollinators, this means hand-pollination is necessary to get fruit. This involves using a small brush to transfer pollen from a male-stage flower to a female-stage flower. Enjoy the process of watching your tree grow and mature, and view any eventual fruit as a well-earned reward for your dedication.
Growing a cherimoya from seed is a long-term project that combines basic horticultural skills with a great deal of patience. Success hinges on starting with high-quality seeds, providing the warm and humid conditions necessary for germination, and carefully nurturing the seedling as it develops. By managing watering, light, and nutrient needs, and protecting the young tree from pests, any dedicated gardener can cultivate this exotic plant. The journey itself, from a single seed to a thriving tree, is a deeply satisfying experience.
- Why experts say you should open your windows when it rains—even if it feels wrong - 10 November 2025
- The ultimate ground cover: why Pachysandra beats weeds and shrugs off winter cold - 10 November 2025
- The secret to attracting robins year-round: why experts swear by these two must-have garden plants - 10 November 2025


